If you're starting a clothing brand or buying apparel for the first time, the clothing manufacturing process can feel overwhelming. There are a lot of moving parts — design, fabric, sampling, sewing, quality checks, and shipping. And if you don't understand how it all works, mistakes can cost you time, money, and your brand's reputation.
Understanding the garment production process helps you make better decisions. You'll know what questions to ask your factory, how to plan your timeline, and how to protect your product quality. Whether you're launching a streetwear hoodie line or a basic T-shirt brand, knowing each step gives you a real advantage.
This guide breaks down the full clothing manufacturing process in simple, clear steps — no jargon, just practical knowledge.
What Is Clothing Manufacturing Process?
Clothing manufacturing is the process of turning a design idea into a finished, wearable garment. It covers everything from the first sketch to the final packaged product ready for shipping.
There are two main types:
- Mass production – Large quantities of the same item, usually for big retail brands. Factories produce thousands of units at lower cost per piece.
- Custom clothing manufacturing – Smaller runs made to your specific design. Common for startups, streetwear brands, and private label businesses. Minimum order quantities (MOQs) are usually lower, but cost per unit is higher.
Most new brands start with custom clothing manufacturing and scale up to mass production as they grow.
Step 1: Clothing Design and Planning
Every garment starts with an idea. Before anything goes to a factory, you need a clear vision of what you're making.
This stage includes:
- Sketching your design (hand-drawn or digital)
- Deciding on garment type — hoodie, T-shirt, jogger, etc.
- Planning colorways and sizes
- Setting a target price point
For example, if you're designing a heavyweight streetwear hoodie, you'll decide at this stage whether it's a pullover or zip-up, what the fit looks like, and whether it has any special features like kangaroo pockets or dropped shoulders.
Don't skip planning. A rushed design leads to expensive changes later in the process.
Step 2: Tech Pack Creation
Create tech pack (technical package) is the blueprint of your garment. It's the most important document in the clothing manufacturing process. Without a proper tech pack, factories can't produce your product accurately. For a comprehensive guide and free templates, you can refer to.
The video below shows how to make the perfect tech pack for your clothing brand step by step.
A good tech pack includes:
- Garment measurements and size grading
- Fabric type, weight, and composition (e.g., 400gsm 100% cotton fleece)
- Colorways with Pantone codes
- Stitching details and seam types
- Placement for labels, tags, and branding
- Printing and embroidery instructions with exact placement measurements
If you're ordering screen printed T-shirts, your tech pack should show exactly where the graphic goes, how large it is, and what colors are used. Factories work from this document — the more detailed it is, the fewer mistakes you'll get.

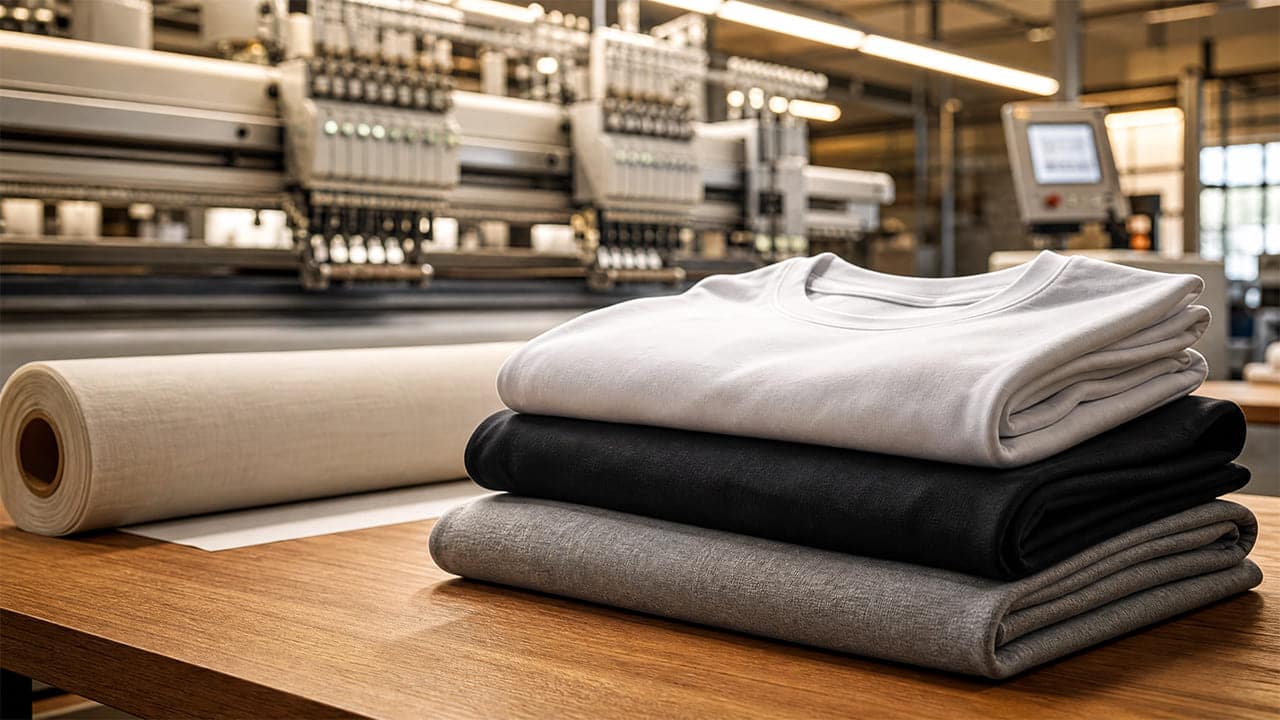
Step 3: Fabric and Material Sourcing
Once your tech pack is ready, the factory sources fabrics and materials. This is a critical step in the clothing production process because the fabric determines everything — the feel, durability, and cost of your garment.
Common fabric choices:
| Fabric | Best For | Notes |
|---|---|---|
| 100% Cotton | T-shirts, basics | Breathable, soft, can shrink |
| Cotton/Polyester Blend | Hoodies, sweatshirts | Less shrinkage, holds shape |
| 100% Polyester | Sportswear, sublimation | Moisture-wicking, color-fast |
| French Terry | Lightweight sweatshirts | Smooth outside, looped inside |
| Fleece | Heavyweight hoodies | Warm, brushed interior |
Beyond fabric, material sourcing also covers trims and accessories — zippers, drawstrings, ribbing, buttons, hang tags, labels, and packaging materials. Every detail needs to be sourced before production begins.
Step 4: Pattern Making and Sampling
Pattern making is the process of creating a paper or digital template for each garment piece. Think of it like a sewing blueprint. Each pattern piece represents a part of the garment — front body, back body, sleeves, hood panels, pockets, and so on.
Once patterns are made, the factory produces a sample — usually called a proto sample or fit sample. This is the first physical version of your garment.
When you receive the sample, you'll check:
- Does the fit match your measurements?
- Does the fabric feel right?
- Are the seams clean and well-sewn?
- Do the proportions look right on an actual person?
You may go through two or three rounds of samples before approving the final version. For a custom hoodie with a complex design, this can take 4–8 weeks. Don't rush this stage — it's your last chance to fix problems before bulk production.
Step 5: Fabric Cutting
Once the sample is approved, fabric cutting begins. This is one of the most important steps in the clothing factory process because poor cutting leads to uneven pieces and wasted fabric.
Marker Making
A digital layout is created to arrange all pattern pieces on the fabric with minimal waste. This is called a marker. Good marker making can save a significant amount of fabric across a large production run.
Fabric Spreading and Cutting
Multiple layers of fabric are laid flat on a cutting table, one on top of the other — this is called spreading. Automated cutting machines or skilled operators then cut through all the layers at once, following the marker layout.
Precision matters here. If a hoodie body panel is cut even slightly off-grain, the garment will twist and pull when worn — a common quality complaint in streetwear.
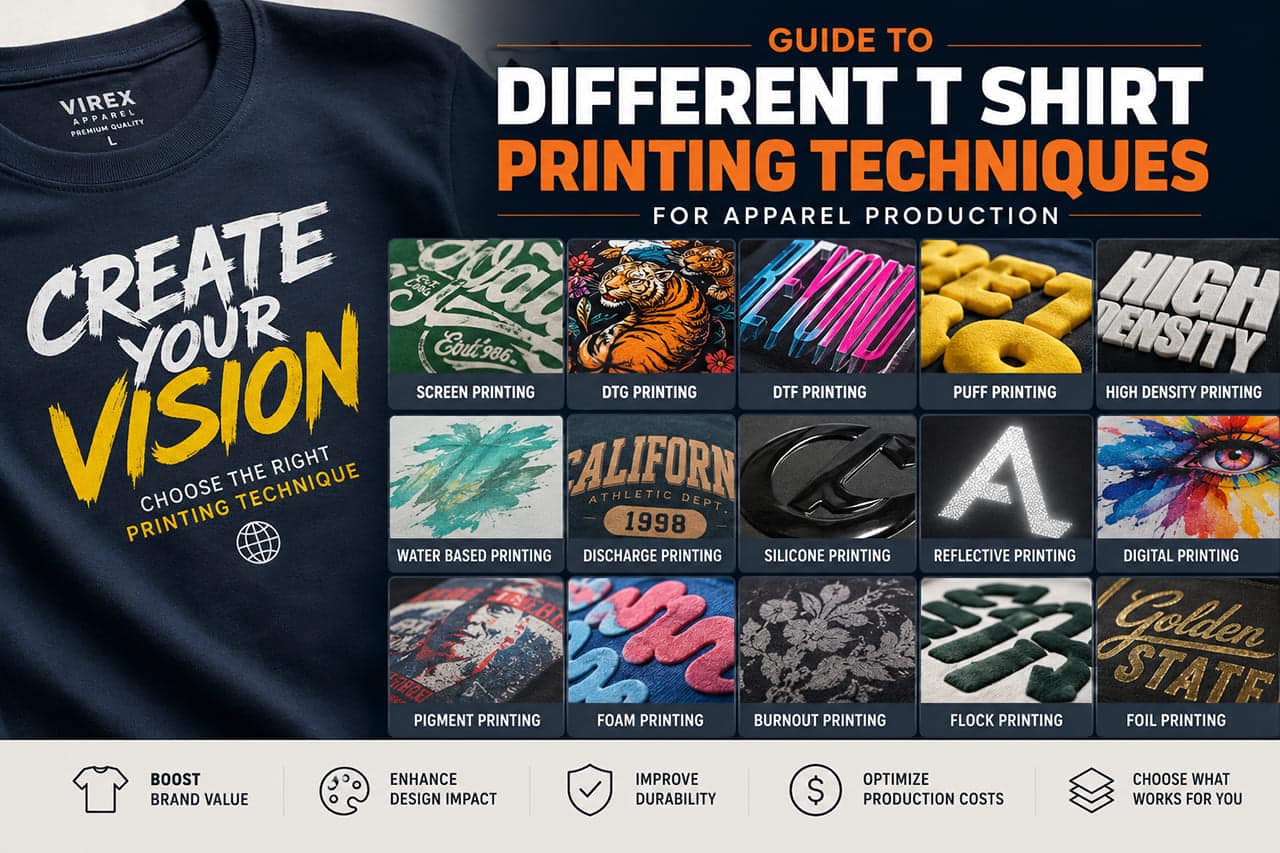
Step 6: Printing and Embroidery
For branded apparel, most decoration happens either before or after sewing, depending on the technique. This is a major part of custom clothing manufacturing process.
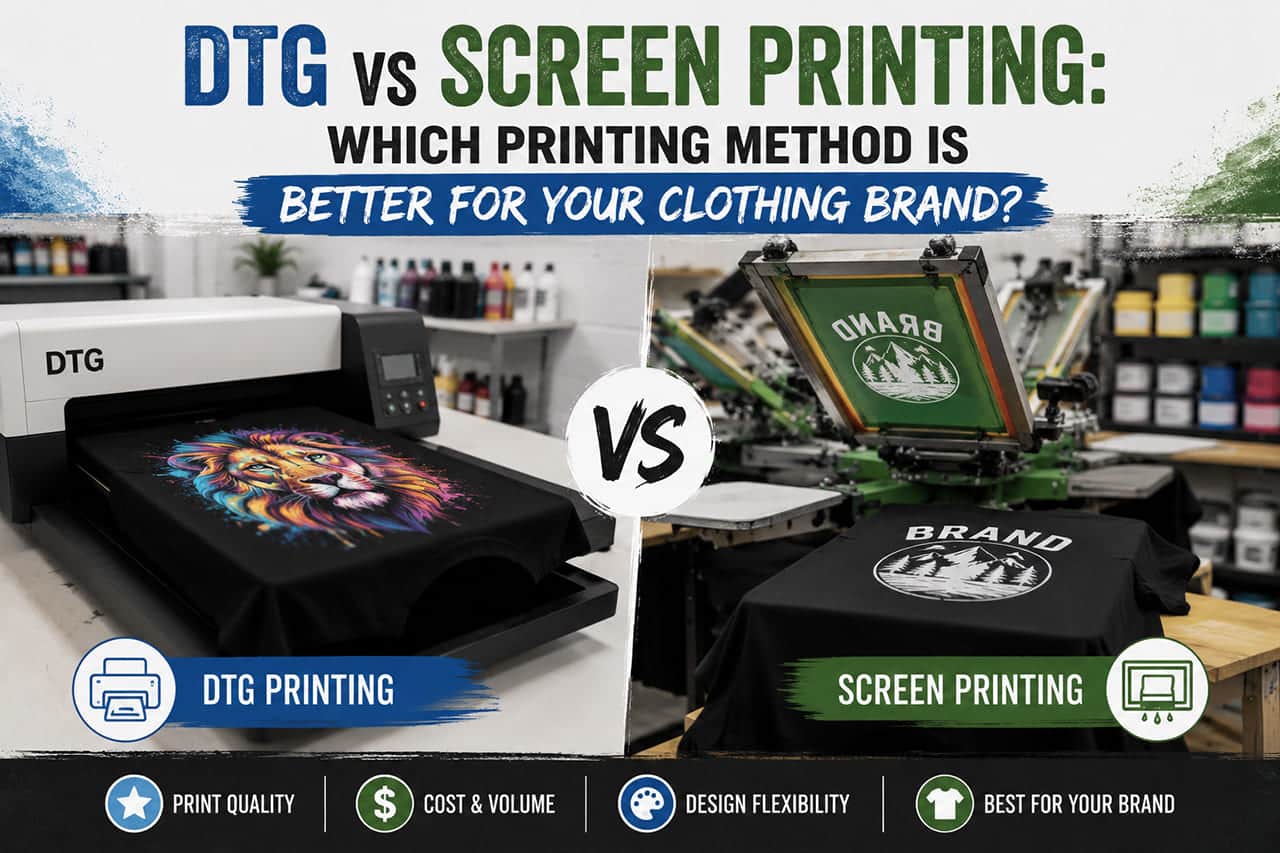
Screen Printing
Screen printing is best for bold graphics with 1–6 colors. Each color is printed through a separate screen. It's cost-effective for large runs and very durable — ideal for T-shirts and hoodies.
DTG Printing
DTG (Direct-to-Garment) printing works like an inkjet printer directly on fabric. Great for photographic designs and small quantities where screen printing setup costs are too high.
Embroidery
Thread is stitched directly into the fabric using an embroidery machine. It gives a premium, high-end look and is common on chest logos, sleeve branding, and headwear.
Puff Printing and Heat Transfer
Puff printing creates a raised, 3D effect — popular in streetwear for bold headline graphics. Heat transfer and vinyl printing are used for numbers, names, and simple cut-out designs, most commonly in sportswear.
Each technique has different costs, minimums, and quality outcomes. Screen printing remains the most popular choice for new streetwear brands because it's durable and cost-effective at volume.
Step 7: Sewing and Garment Assembly
This is the heart of the garment manufacturing process. Cut pieces are assembled by skilled operators on industrial sewing machines, following the tech pack instructions.
A T-shirt might only need a few operations — shoulder seams, side seams, sleeves, and hem. But a hoodie requires many more steps: body assembly, hood construction, cuffs, waistband, kangaroo pocket, drawstring insertion, and label sewing.
Factories organize this using production lines, where each operator specializes in one or two operations. A finished garment moves from machine to machine until it's fully assembled.
Stitch quality is checked throughout. Key things to look for:
- Consistent stitch length
- No skipped stitches
- Clean seam allowances
- Properly aligned panels
A poorly sewn garment can fall apart after a few washes — which is the last thing a growing clothing brand needs.

Step 8: Quality Control
Quality control (QC) happens at multiple points during and after production. A solid QC process protects your brand and reduces returns.
What gets checked during QC:
- Measurements vs. the approved tech pack
- Stitch integrity and seam strength
- Fabric defects (holes, stains, weave issues)
- Print or embroidery placement and quality
- Color consistency across the batch
- Label and tag placement
Factories typically inspect garments using the AQL (Acceptable Quality Level) system — a statistical sampling method that determines how many units to inspect per batch and what defect rate is acceptable. For a detailed understanding of AQL, you can read .
For a brand new to manufacturing, it's worth hiring an independent QC inspector to visit the factory during or after production. It adds a small cost but can save you from receiving an entire batch of defective hoodies.

Step 9: Washing, Finishing, and Packaging
After sewing and QC, garments go through finishing. This is the final preparation before they're packed and shipped.
Finishing steps typically include:
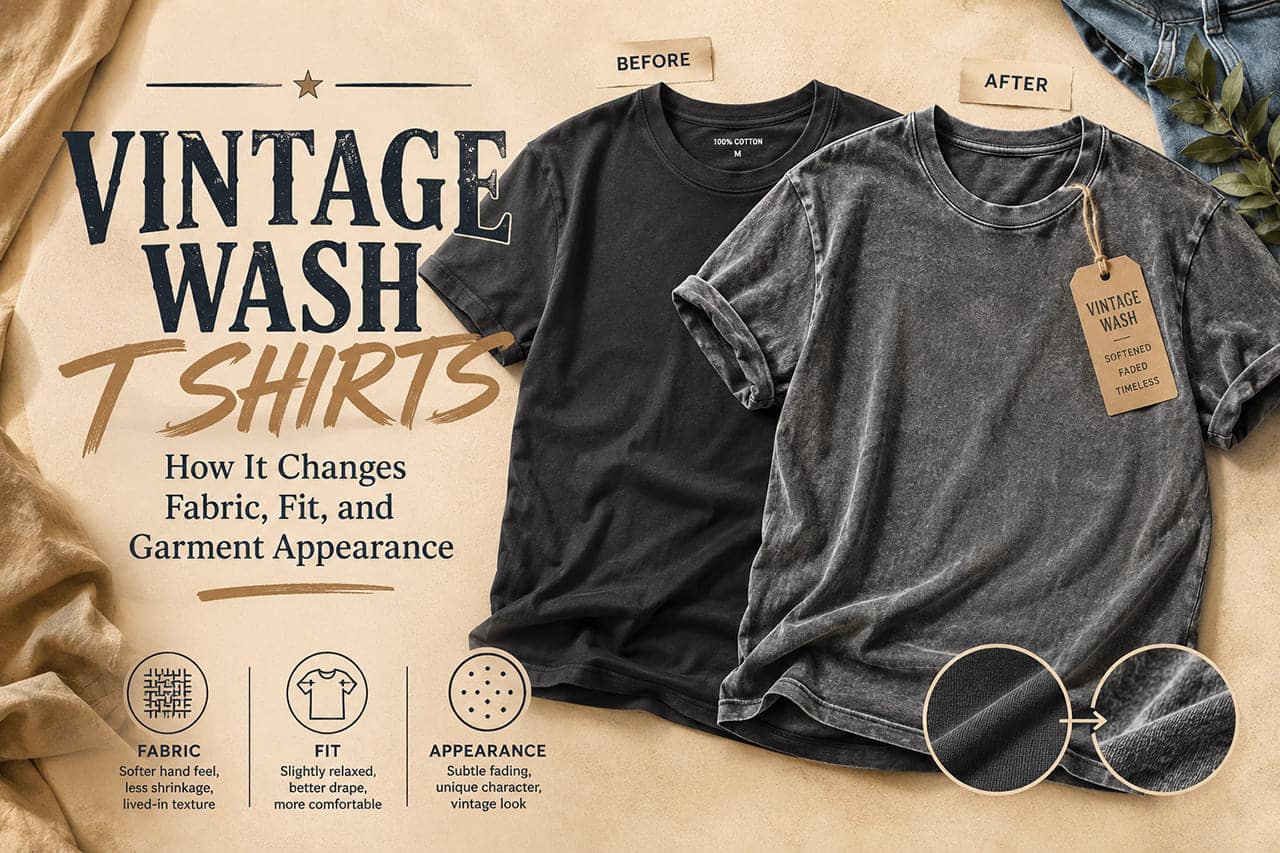
- Washing – Industrial washing removes excess dye, softens fabric, and pre-shrinks the garment. The method depends on the fabric and desired finish (garment washed, enzyme washed, stone washed, etc.)
- Ironing and pressing – Garments are steamed and pressed for a clean, professional look
- Hang tags and labels – Branded hang tags, woven labels, and care labels are attached
- Folding and packaging – Garments are folded to a standard size, placed in polybags, and packed into cartons
Packaging can be more strategic than it sounds. For a premium streetwear brand, the unboxing experience matters — branded tissue, custom poly bags, and printed stickers all reinforce your brand identity from the moment the customer opens the package.
Step 10: Shipping and Delivery
The final step in the apparel manufacturing process is getting your goods from the factory to your warehouse or customers.
Main shipping methods:
| Method | Speed | Cost | Best For |
|---|---|---|---|
| Air freight | 5–10 days | High | Urgent orders, small quantities |
| Sea freight (LCL) | 20–45 days | Moderate | Medium quantities, shared container |
| Sea freight (FCL) | 20–45 days | Low per unit | Large bulk orders, full container |
Sea freight is the most cost-effective for large production runs. Most brands shipping from Asia to the US or Europe use sea freight for bulk orders and air freight for samples or urgent restocks.
Always factor shipping time into your overall production timeline. A full clothing manufacturing cycle — from tech pack to delivery — typically takes 60–80 days for a new product.
Common Problems in Clothing Manufacturing
Even experienced brands run into issues. Here are the most common problems in the clothing factory process and how to avoid them:
Poor communication with the factory – Vague instructions lead to wrong products. Always use a detailed tech pack and confirm every decision in writing.
Wrong fabric choice – Ordering a 180gsm T-shirt for a winter collection is a basic mismatch. Know your fabric weights before you place an order.
Delayed samples – Factories are busy. Build sample lead time into your planning, especially during peak production seasons (Chinese New Year, summer holidays).
Shrinkage problems – Cotton fabrics can shrink 3–8% without proper pre-washing. Request pre-shrunk fabric or include a wash test in your QC process.
Color inconsistency – Dye lots vary between batches. Always use Pantone codes in your tech pack and request lab dip approvals before bulk production.
MOQ misalignment – Some factories won't produce fewer than 500–1000 pieces per style. Know the minimums before choosing a factory.
Final Thoughts
The clothing manufacturing process is a chain. Every step depends on the one before it. A great design won't save a garment with a poor tech pack. A good tech pack won't help if the fabric is wrong. And the best fabric means nothing if the factory's sewing quality is inconsistent.
Understanding each stage — from design and tech packs to sampling, cutting, printing, sewing, QC, and shipping — gives you the knowledge to manage your production properly and ask the right questions at the right time.
Choosing the right manufacturer is just as important as the product itself. A factory that communicates well, hits deadlines, and maintains quality is a long-term partner in your brand's growth. Take time to vet factories, order samples, and build that relationship before committing to large production runs.